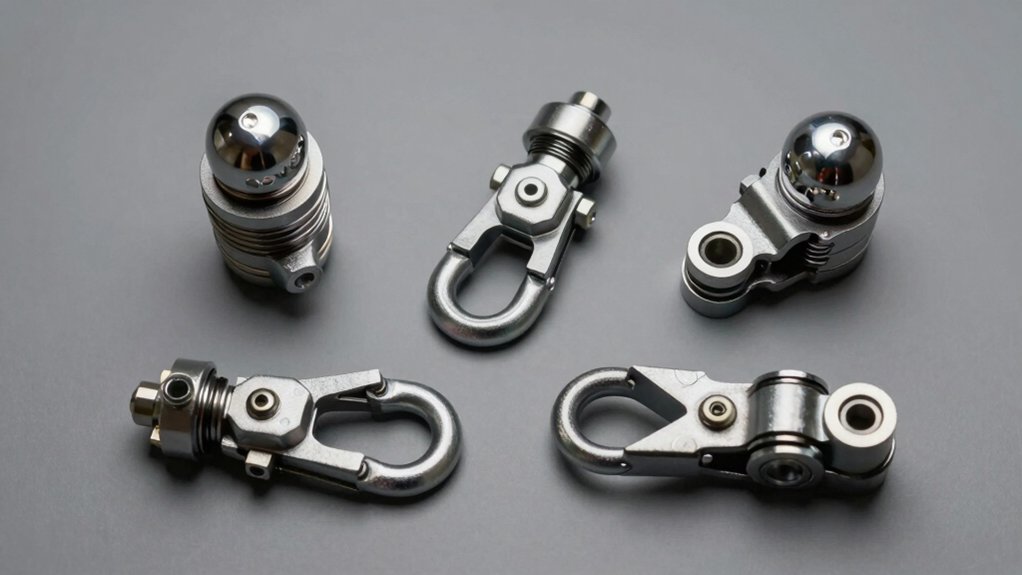
You’re working with two distinct components in your towing system. Your ball mount is the structural assembly that inserts into your vehicle’s receiver and handles weight transfer dynamics. Your hitch ball is the detachable coupling that attaches to the mount and rotates freely inside your trailer’s coupler. Both need matching weight ratings for safe towing. Understanding how they work together is essential for selecting the right setup for your specific vehicle and trailer configuration.
What’s the Difference Between a Ball Mount and a Hitch Ball?
How do you distinguish between a ball mount and a hitch ball? The ball mount is the structural assembly that inserts into your vehicle’s hitch receiver, while the hitch ball is the detachable coupling component that attaches to the ball mount’s platform.
Your ball mount handles the strength of connection, securing the entire towing setup through its shank and hitch pin. It manages weight transfer dynamics by positioning the hitch ball at the correct height for level towing. The hitch ball itself is a removable, spherical component that rotates freely within your trailer’s coupler. Both components have specific weight ratings that must be matched to ensure safe towing capacity for your vehicle and trailer combination.
The ball mount varies by shank size (1-1/4″ to 3″) and features rise or drop measurements. Your hitch ball comes in specific diameters (1-7/8″, 2″, 2-5/16″) with corresponding weight capacities. Standard receiver tube sizes determine which ball mount shank you’ll need for your vehicle’s hitch receiver. Understanding this distinction guarantees you’re selecting the right components for your towing application.
What Size Shank and Receiver Do You Need?
Selecting the correct shank and receiver size is fundamental to safe towing, as mismatches compromise your vehicle’s structural integrity and towing capacity. You’ll find shank sizes matching receiver tube measurements: 1-1/4, 2, 2-1/2, or 3 inches. Measure your receiver’s inside dimensions—not outside—to determine proper fit. For half-ton trucks and SUVs, 2-inch shanks are standard with Class III/IV receivers supporting up to 12,000 lbs GTW. Larger vehicles like 3/4-ton and 1-ton trucks require 2-1/2-inch shanks post-2015. Heavy-duty applications demand 2-1/2 or 3-inch receivers for Class V hitches handling 20,000+ lbs. Receiver hitches offer strong, secure towing capabilities, but you must verify compatibility with your vehicle’s frame and specifications. To avoid measurement errors, use a tape measure to gauge the inside-to-inside dimensions of your hitch receiver rather than relying on visual estimates. Remember that hitch class is based on Gross Trailer Weight and Tongue Weight capacity rather than receiver size alone, so verify your vehicle’s actual towing specifications before finalizing your accessory choice. Your shank size considerations must align with your vehicle’s receiver tube measurements and intended towing load to guarantee safe operation.
Does Your Setup Need a Fixed or Adjustable Ball Mount?
Once you’ve matched your shank and receiver sizes, you’ll need to determine whether a fixed or adjustable ball mount suits your towing needs.
Fixed mounts work well if you’re towing versus transportation with a single trailer matching your vehicle’s receiver height. They’re lighter, cheaper, and require minimal maintenance requirements beyond occasional inspection. To ensure proper fitment, you should measure hitch drop between your vehicle’s hitch receiver and the trailer’s coupler height to confirm a fixed mount will keep your trailer level.
Adjustable mounts become essential when you’re switching between multiple trailers with varying coupler heights or tow vehicles. They accommodate different drop/rise configurations without purchasing multiple fixed mounts. Their pin-and-clip systems allow on-the-go adjustments, reducing sway and improving ride quality. Dual ball designs enable quick transitions between different coupler sizes without requiring separate ball mounts. Premium adjustable options like the Weigh Safe Drop Hitch provide built-in tongue weight gauges and aircraft-grade materials for enhanced durability and safety. Proper tongue weight management is critical for preventing trailer sway and protecting your vehicle’s rear suspension during extended towing operations.
Consider your long-term towing plans. If you’ll regularly transport different trailers, an adjustable mount eliminates repeated swaps and storage hassles. For single-trailer setups with consistent heights, a fixed mount provides reliable, economical performance with straightforward maintenance requirements.
When Should You Use a Ball Mount Receiver Tube Adapter?
Why do you need a receiver tube adapter? You’ll use one when your ball mount’s shank doesn’t match your vehicle’s receiver tube size. For example, a 2″ shank accessory won’t fit a 1-1/4″ receiver without an adapter.
However, understand that adapters create capacity reduction limitations. They typically halve your tongue weight and gross towing weight ratings due to increased leverage on the hitch tube. A 1-1/4″ to 2″ adapter maxes out at 350 lbs tongue weight and 3,500 lbs GTW. Adapters ensure a secure connection between your equipment and the vehicle’s hitch receiver when properly installed. When selecting an adapter, consider material quality and durability to ensure reliable performance across different towing applications. The weight capacity specifications of each adapter should match your vehicle’s towing requirements and the equipment you plan to haul.
For secure fit requirements, install anti-rattle systems to prevent movement. Different adapter types and specifications are available to match various vehicle configurations and towing needs. Never use adapters for direct towing with mismatched ball mounts—they’re strictly for accessories. Always verify your vehicle’s hitch rating and apply corresponding reductions before towing.
How Do You Calculate Weight Capacity?
Proper weight capacity calculations are essential to safe towing—they’re what prevent you from overloading your vehicle, trailer, and hitch components. Start by calculating tongue weight percentage, which should fall between 10–15% of your trailer’s actual weight, with 12–13% being optimal for sway control. Next, factor in estimating hitch hardware weight: add 80–120 pounds for a weight distribution hitch or 180–250 pounds for a fifth-wheel hitch. Always verify that your ball mount’s weight rating meets or exceeds your trailer’s GVWR. Never exceed the lowest-rated component in your entire towing system. The tow ball’s weight rating must match or exceed the trailer’s GVWR to ensure safe towing capacity. Different hitch ball sizes are engineered with specific weight capacities, so selecting the correct diameter ensures compatibility with your towing needs. Matching the ball size precisely to your trailer’s coupler prevents dangerous issues like swaying, bouncing, or detachment while driving. Your receiver tube size must match your vehicle’s hitch receiver to safely accommodate the ball mount and distribute towing loads. Cross-reference your truck’s towing capacity against your trailer hitch rating to guarantee everything aligns safely.
How Do You Measure Drop and Rise for Proper Leveling?
Subtract measurement B from A to find your required drop. A positive result means you need a drop ball mount. Conversely, if your coupler sits higher than your hitch, you’ll need rise instead.
For trailer coupler adjustments, selecting proper drop/rise prevents trailer tilt and instability. A correct trailer hitch drop ensures stability, braking efficiency, and longevity of your suspension and tires during towing. Both Class 3 and Class 4 hitches feature a 2-inch receiver tube that accommodates standard ball mounts for proper connection. Different vehicle classes and towing needs require careful consideration of drop distances and weight ratings to ensure safe operation. To prevent damage to your hitch and vehicle, maintain at least 11 inches of ground clearance between the road surface and your mounted hitch. Round measurements to the nearest available increment—typically 2-inch steps or 1/4-inch increments. This straightforward process takes minutes but guarantees your towing setup maintains proper alignment and safety.
How Do You Install a Ball Mount?
Installing a ball mount involves assembling several components in the correct sequence to guarantee a secure, level towing connection. You’ll start by selecting ball mount materials and sizes that match your trailer’s coupler requirements. Insert the threaded shank through your ball mount platform, then slide the lock washer and nut onto the shank. Hand-tighten the nut before using a wrench and holding tool to fully compress the lock washer. Apply the proper attachment method by torquing to specifications: 160 ft-lbs for 3/4-inch shanks, 250 ft-lbs for 1-inch, and 450 ft-lbs for 1-1/4-inch shanks. Next, insert the mounted assembly sideways into your receiver tube and rotate it to your desired drop or rise position. Finally, align the holes, insert the hitch pin, and secure the retaining clip firmly before towing. To ensure maximum safety, secure your vehicle with jack stands on a level surface before beginning installation work. Before you begin, verify that your vehicle towing capacity will safely support your trailer’s weight. The hitch ball weight rating should be equal to or larger than both your hitch and ball mount to ensure safe operation. Once the ball mount is securely installed, you can attach your draw bar to complete the towing assembly.
What Mistakes Should You Avoid When Choosing a Ball Mount?
Once you’ve mastered the installation process, you’ll want to confirm you’re selecting the right ball mount in the first place—mistakes here can undermine even the most careful assembly work.
Overlooking safety standards creates serious risks. You must validate the mount’s weight capacity matches or exceeds your trailer’s gross weight, and you can’t ignore towing dynamics by neglecting proper rise-drop adjustment. Misaligned heights cause sway and uneven weight distribution. When adjusting your ball mount, remember that the rise or drop position you select depends on whether your receiver height is higher or lower than your coupler height.
Don’t skip shank size verification—measure your receiver tube opening precisely. A mismatched shank requires adapters that compromise stability. The most common hitch ball sizes are 1-7/8 inches, 2 inches, and 2-5/16 inches, with each size designed to match specific coupler specifications. Matching your ball mount to the appropriate hitch class for your vehicle ensures compatibility and safe towing capacity.
Affirm the trailer sits level before measuring coupler height against your hitch receiver. Torque the hitch ball to at least 250 ft-lbs and inspect all bolts and pins for tightness. These checks prevent disconnection during transit and verify safe towing performance.
How Do You Select a Ball Mount for Multiple Trailers?
Anyone managing multiple trailers with varying coupler heights faces a critical decision: invest in several fixed ball mounts or choose an adjustable solution. Adjustable ball mounts resolve this dilemma efficiently. You’ll measure your hitch height adjustment needs once, then accommodate different trailers without purchasing multiple mounts. These mounts offer 4 to 10 inches of drop or rise in 1-inch increments, addressing coupler height variations across boat, enclosed, RV, and utility trailers. You’ll select the shank size matching your receiver, verify weight capacity exceeds your heaviest trailer’s gross weight, and maintain level towing alignment when loaded. Consistent leveling is important when towing different trailers to ensure safe handling and reduced wear on your vehicle and hitch components. One adjustable mount simplifies your setup while keeping you safe and compliant with towing standards.