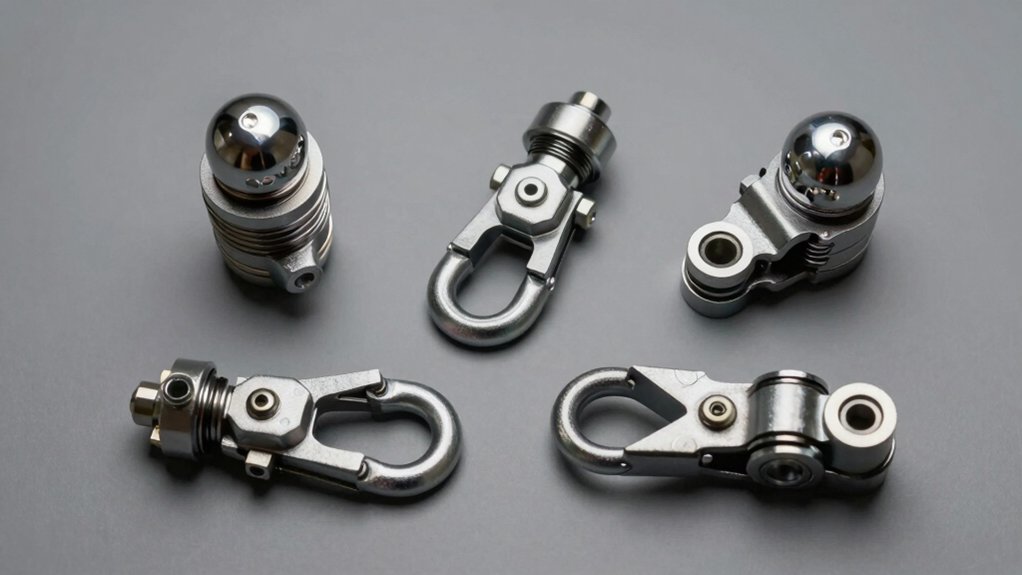
You’ve got several hitch pin options to choose from based on your towing needs. Basic L-shaped pins with R-clips offer affordable simplicity for Classes 1-2, while locking pins provide key-operated security against theft. Swivel pins minimize rattling during transit, and clevis pins accommodate specialized applications. Your receiver size and load class determine the correct diameter—typically 1/2″ for lighter duties or 5/8″ for heavier loads. Each type features material options like carbon steel or stainless steel for durability. Understanding these distinctions helps you ascertain which pin best matches your specific towing situation.
What Are Hitch Pins and Why They Matter for Towing
If you’ve ever towed a trailer, you’ve relied on a component that’s often overlooked: the hitch pin. This straight metal pin with a looped end secures your trailer hitch to your towing vehicle’s receiver, preventing the ball mount shank from sliding out during transit. You’ll find hitch pins are typically L-shaped with a hole for a hairpin clip or retaining mechanism. Their heavy-duty design distributes shear stress across the pin’s length, keeping your trailer firmly attached. For effective performance, proper size selection guarantees compatibility with your specific receiver and hitch configuration—matching pin diameter to hitch class ensures secure engagement with Class I/II or Class III/IV/V receivers. You should choose corrosion resistant materials like spring steel to withstand environmental exposure and heavy use. Premium hitch pins offer enhanced material quality and durability compared to standard alternatives, providing superior performance under demanding towing conditions. Different types of hitch pins, including standard pins, locking pins, quick release pins, and safety pins, accommodate various towing needs and trailer hitch designs. Regular inspection catches wear or damage before it compromises safety, and pairing your hitch pin with safety chains provides additional protection during towing operations, making this simple component critical for secure trailer operation.
Match Your Hitch Pin to Load Class and Receiver Size
Selecting the correct hitch pin requires matching it to your vehicle’s hitch class and receiver dimensions, since incompatible combinations compromise safety and towing capacity. Proper hitch pin sizing depends on two critical factors: receiver size and load class.
Class 1 and 2 hitches use 1-1/4″ x 1-1/4″ receivers with 1/2″ diameter pins and 2″ minimum lengths. Class 3 and 4 hitches require 2″ x 2″ receivers with 5/8″ diameter pins and 3″ minimum lengths. Class 5 hitches accommodate multiple receiver sizes—2″, 2-1/2″, or 3″—all requiring 5/8″ pins, but matching hitch pin length to trailer demands varies: 3″, 3-3/8″, or 4-7/8″ respectively.
Your vehicle’s gross trailer weight capacity determines the necessary class, which then dictates the pin specifications you’ll need. Undersized pins risk shear or failure under the load demands of your towing application, making precise diameter matching essential for safe operation. When evaluating hitch pins for your specific needs, consider key features such as material quality and durability ratings to ensure reliable performance.
Basic Hitch Pins: Simple, Affordable Solutions
When you’re looking for a straightforward, cost-effective towing solution, basic hitch pins deliver reliable performance through their time-tested L-shaped design and simple R-clip retention system. You’ll find these pins widely available at auto parts retailers, making them accessible for routine replacements.
Carbon steel construction meets standard durability requirements for light to medium towing applications up to 12,000 lbs. If you need corrosion resistance in harsh environments, stainless steel variants protect against oxidation and degradation. The 1/2-inch diameter accommodates class 1 and 2 hitches, while 5/8-inch pins suit class 3, 4, and 5 receivers, handling shear forces exceeding 50,000 lbs. Ensuring the hitch pin fits snugly in the receiver prevents unwanted movement during towing.
Installation requires no specialized tools—you simply insert the pin through the receiver and secure it with an R-clip or cotter pin. For demanding applications like farming or heavy towing, tethered clips and lynch pins prevent loss or accidental release more effectively than hairpins. For enhanced security during towing, consider pairing basic pins with trailer hitch locks to prevent theft and unauthorized use. For those towing heavy loads or concerned about security, locking trailer hitch pins offer advanced theft protection compared to standard options. Their affordability and straightforward operation make them ideal for everyday towing demands.
Locking Hitch Pins for Maximum Security
Standard hitch pins leave your trailer vulnerable to theft, but locking variants step up security through key-operated mechanisms that prevent unauthorized detachment. You’ll find pin-style locks ideal for general use, compatible with Class I through IV hitches. These chrome-coated steel models provide corrosion resistance essential for long-term durability.
For enhanced protection, deadbolt-style locks feature internal bars that resist prying, pulling, and hammering. You’ll appreciate weather sealing that prevents rust accumulation in harsh conditions. Advanced receiver-style options include dual locking heads with multi-pin cylinders that deter picking attempts. Top-performing models like the AMP Lock U-HLP58318 feature high-security key systems with nearly one million combinations for superior theft resistance. Layered defense systems using multiple locks on different components create the most effective trailer security strategy.
Self-locking mechanisms offer spring-loaded alternatives requiring no key operation, while magnetic variants guarantee positive alignment. Comparing security ratings across models helps you identify the best protection level for your specific needs. Proper maintenance and installation of your hitch locks ensures optimal performance and longevity throughout the lifespan of your trailer security system. You can select keyed-alike options to simplify managing multiple locks across your equipment. These systematic security upgrades effectively deter theft across all hitch classes.
Specialized Options: Swivel, Anti-Rattle, and Clevis Pins
Beyond basic locking mechanisms, three specialized pin designs address specific towing challenges: swivel pins, anti-rattle pins, and clevis pins.
Swivel pins feature built-in retainer clips that pivot to open or close positions, eliminating lost clips. You’ll appreciate their bent handles and zinc-plated construction for durability. These swivel pins are compatible with both 1/2″ and 5/8″ receiver openings, making them versatile for various towing applications.
Anti-rattle pins solve vibration control issues in hitch applications by providing snug fits that minimize movement during travel. You can choose from steel or zinc-plated options for customizable finishes suited to your environment. Proper pin diameter and length specifications ensure optimal performance across different implement types. When selecting anti-rattle pins, consider the weight capacity of your receiver, as 2″ receivers typically handle up to 10,000 lbs while 3″ receivers can manage 30,000 lbs or more. Reducing noise and movement during towing keeps your trailer secure and enhances the overall towing experience.
Clevis pins offer heavy-duty solutions for specialty applications like agricultural towing and rigging. Their cylindrical design with perpendicular cotter pin holes resists shear forces, securing tow bars and chains reliably.
Each design addresses distinct operational demands, ensuring you select the appropriate pin for your specific towing requirements.
Installation Best Practices and Common Mistakes
Because proper hitch pin installation directly impacts your towing safety, you’ll need to understand the critical relationship between pin diameter, hitch class, and hole alignment. Start by measuring your receiver hole’s inside diameter to guarantee you’ve ordered the correct pin size—Class 1 and 2 hitches require 1/2-inch pins, while Class 3, 4, and 5 demand 5/8-inch pins.
Before insertion, verify that receiver and accessory holes align cleanly. Make minor receiver fitment adjustments by repositioning your ball mount within one inch if needed. Insert pins from the driver’s side using proper pin insertion technique, ensuring complete passage through the receiver. Hitch pin sizing should match your hitch class and GTW/TW limits to ensure compatibility with your vehicle’s towing capacity. Selecting hitch pins by material composition ensures durability and corrosion resistance for long-term towing reliability. A friction-based fit absorbs vibration and reduces lateral movement during transport, creating a smoother ride and protecting your gear from unnecessary wear. Always ensure your pin selection aligns with the receiver tube size of your vehicle’s hitch receiver to maintain proper safety standards. Secure your hairpin clip so it touches the pin’s lowest point with no gaps. Never force misaligned pins, as this damages both pin and receiver, compromising safety.
Securing Your Pin: Clips, Cotter Pins, and Accessories
Once you’ve inserted your hitch pin through properly aligned holes, you’ll need to secure it with a fastening mechanism to prevent accidental withdrawal during towing. You’ve got several options to choose from. Wire retainer clips pass through the pin’s end hole for basic security. For enhanced protection, you can use cotter pins inserted perpendicularly through the pin hole, or grip clips that snap over the pin shaft. Quick release hitch pins with snap rings enable faster disconnection when needed. Shaft lock configurations featuring swivel clips pivot between lock and unlock positions for convenient access. Consider stainless steel or zinc-plated finishes to resist corrosion. R-clips provide an additional secondary locking layer against accidental disengagement, particularly valuable for heavy-duty towing applications where reliability matters. Linch pins offer a self-locking mechanism with a spring-loaded design that automatically secures wheels and hitch components without requiring additional tools. High-quality locking hitch pins with knurled grips and dual keys provide enhanced security features for extended towing operations. Proper fastener selection and maintenance will help prevent costly equipment damage during heavy towing operations. Selecting the appropriate fastener depends on your specific hitch class and vehicle weight requirements to ensure safe trailer towing.
Hitch Pin Maintenance: Preventing Wear and Failure
While securing your hitch pin with the right fastening mechanism is essential, maintaining it properly guarantees long-term reliability and prevents costly failures during towing. You’ll need to implement rust prevention methods by applying protective coatings and fogging oil before winter storage, especially in salty or wet conditions. Conduct seasonal maintenance checks twice yearly—spring inspections target winter rust accumulation, while fall checks assess cold-cracking susceptibility. Lubricate hitch pins regularly with high-quality grease or dry lubricant for off-road use, cleaning excess buildup afterward. Regular maintenance is key to ensuring your hitch pin remains in top condition and performs reliably throughout its lifespan. Inspect pins before each use for wear, cracks, and corrosion. After cleaning with mild soap and warm water, dry thoroughly to prevent moisture trapping. For stubborn rust that develops despite preventive measures, apply penetrating oil or rust remover spray and allow adequate dwell time before scrubbing to restore compromised surfaces. Store your hitch covered when not in use to shield it from harsh weather and environmental damage.
Agricultural and Rigging Hitch Pins: Beyond the Tow Vehicle
Agricultural operations and rigging applications demand hitch pins engineered to specifications far more complex than standard towing hardware. You’ll find that 3-point hitches attach implements directly to tractors through precisely matched categories—from Category 0‘s 5/8-inch pins for sub-20 HP machines to Category 3‘s 1 7/16-inch pins for 225 HP tractors. Quick hitches are available for various size implements, allowing operators to hook up equipment without leaving the seat.
Universal hitch pin applications extend beyond basic towing. You’re coupling heavy implements, grain carts, and tandem wagons where pin grade directly correlates to load capacity. Industrial hitch pin use requires grade selection based on shear strength calculations—Grade 8 pins handle 58,000-pound loads in single shear, while Grade 5 suffices for 30,000-pound applications.
You’ll secure these pins with linch pins, R clips, cotter pins, or hair pin clips. High carbon steel construction with heat treatment guarantees durability across demanding farm operations where equipment control remains critical. Some sub-compact tractors feature limited category 1 hitches that are lower to the ground and may not lift as high or open as wide as standard category 1 hitches.
Troubleshooting: Why Your Hitch Pin Keeps Loosening
Because hitch pins experience constant vibration and load cycling during transport, they’re prone to backing out without proper diagnosis and correction. You’ll identify loosening patterns by examining alignment issues first—misaligned receivers or ball mounts create uneven stress distribution, accelerating pin displacement. Next, inspect for corrosion and debris that compromise the locking mechanism’s grip. Road salt, rust, and accumulated grime reduce friction between pin and hole, allowing gradual migration outward. You can combat this by cleaning thoroughly with a wire brush and degreaser, then applying fresh lubricant. Verify your ball size matches coupler specifications exactly. Finally, tighten the latch adjustment nut to establish proper clamping tension. These systematic corrections stabilize your hitch pin permanently. Regular inspection before each use will help you catch loosening issues early before they become safety hazards on the road.